Come check out winstead wandering!

I’m blogging now at a new site, winstead wandering. You’ll find recipes, random thoughts, and snippets of life. I’d love for you to come by and let me know what you think.

Posted in Uncategorized | Leave a comment

Crispy Parmesan Eggplant Fries

Crispy Parmesan Eggplant Fries

I came home from work last week and found a wonderful gift on the back porch: two eggplants and several banana peppers. When I saw the eggplant, I knew immediately that I wanted to make crispy oven-baked fries.

I had visions of my family, toddlers and picky husband included, eating them together, exclaiming how delicious they were and why do we even need French fries when we have these?

In reality, it looked more like this: Jon was gone, so I made the fries while I introduced the kids to The Little Mermaid. The whole time I was cooking, I hyped them: “Mama’s making fries! Let’s have a picnic in the living room and eat the fries! Who wants delicious fries?”

When the fries were done, the three of us squeezed on to a bath towel on the floor with a bowl of oven-warm fries in front of us. Bennie grabbed one to feed me but wouldn’t eat it herself. Griffin shook his head, insisted “I want yellow” and went back to lining up his planes.

Because the kids wouldn’t even taste these, I ate my share plus their’s. I can say with good authority that they’re delicious. The outside is crunchy and crispy and flavorful, while the inside is mild and tender. If your kids are even slightly more adventurous than mine, they’ll love these.

Crispy Parmesan Eggplant Fries

Crispy Parmesan Eggplant Fries
adapted from Closet Cooking

1 medium eggplant, peeled and cut into 1/4 inch thick sticks
2/3 cup flour
2 eggs
3/4 cup Panko breadcrumbs
1/4 cup Parmesan cheese
1 teaspoon Italian seasoning
1/2 teaspoon seasoned salt
1/2 teaspoon garlic powder
1/4 teaspoon pepper

Preheat oven to 425 degrees and lightly spray a foil-covered baking sheet with cooking spray. In a medium bowl, combine the flour, seasoned salt, garlic powder, and pepper. In a separate medium bowl, lightly beat the two eggs. In a third medium bowl, combine the breadcrumbs, Parmesan cheese, and Italian seasoning.

In batches of 4-6 “fries” at a time, coat eggplant in flour, then eggs, then breadcrumbs. Make sure sticks are evenly coated with each mixture before moving to the next. After the breadcrumbs, place fries on the baking sheet in a single layer.

Bake for 8-12 minutes, until crispy and just beginning to turn golden in spots. Serve with warm marinara sauce for dipping.

Crispy Parmesan Eggplant Fries

I want to know: what’s your favorite way to prepare eggplant?

Posted in Food & Recipes | Leave a comment

Easy Peanut Butter Cup Bars

Homemade peanut butter cup bars. Fast, easy, and gluten free!

My husband loves peanut butter cups. So much so, in fact, that for his last birthday he requested that I make these instead of birthday cake. I was cool with that, because I love them, too. Every time I’ve made them in the past they were a hit, but drizzling the chocolate into each cupcake liner can be tedious.

When I wanted a quick dessert to take to a get-together last weekend, those peanut butter cups came to mind. I didn’t want to spend the extra time required to make individual cups, so I decided to make an entire slab on a cookie sheet and cut it into squares.

These bars are just as good as the homemade peanut butter cups, but they come together so much more quickly. Bonus: they’re gluten free!

Homemade peanut butter cup bars. Fast, easy, and gluten free!

Homemade Peanut Butter Cup Bars

3 cups chocolate chips, divided (about a bag and a half)
2 cups plus two tablespoons peanut butter, divided
1 cup powdered sugar
1 1/2 teaspoons vanilla extract

Melt half of the chocolate with a tablespoon of peanut butter, either in the microwave or on the stove using a double boiler. On a cookie sheet lined with parchment or wax paper, spread the melted chocolate into an even layer. Put the pan in the freezer for ten minutes.

Meanwhile, mix two cups of peanut butter with the vanilla extract, then mix in the powdered sugar. Melt the remaining chocolate with the remaining peanut butter. Remove the first layer of chocolate from the freezer and spread the peanut butter on top. Smooth the rest of the chocolate over that and return to the freezer for ten more minutes. Cut into bars and enjoy!

Notes: you can certainly melt all of the chocolate at once and then just spread half on the tray, but I didn’t want to have to think about using exactly half. These bars are easiest to cut after sitting out of the freezer for a few minutes. Also, you could easily substitute a package of chocolate bark (also gluten free) for the chocolate chips, you just won’t get as rich of a chocolate flavor.

Homemade peanut butter cup bars. Fast, easy, and gluten free!

I want to know: what is your go-to crowd-pleasing get-together dessert?

Posted in Uncategorized | Leave a comment

Mexican Pizzas

Copycat Taco Bell Mexican Pizzas

Confession: I’ve never had a Taco Bell Mexican Pizza. I have, however, made this copycat recipe at least once a week since I discovered it a few months ago. It’s that good.

The recipe calls for refried beans- I make mine using this recipe– and taco meat, but I often make mine with just beans and my husband’s with meat only.

Just as with regular tacos, this recipe can be adapted to fit the preferences or dietary needs of just about anybody; in fact, it practically begs for it.

Sidenote: there’s no way around it; these do not photograph well after they’re cooked.

Copycat Mexican Pizzas

Mexican Pizzas
adapted from here
(recipe makes 4 pizzas; adjust it as needed)

8 6-inch tortillas
1 – 1 1/2 cups (1 can) refried beans (you may want more if you’re omitting the meat)
1/2 pound taco meat (prepare your ground beef or turkey as you normally do for tacos)
1/2 cup taco sauce (salsa works, too)
1 cup shredded cheese
cooking spray or 4 tablespoons of vegetable oil

Additional optional toppings:
-diced tomato
-shredded lettuce
-sour cream
-diced avocado

Preheat oven to 400 degrees. Brown your tortillas on both sides in a saucepan, either in hot oil or by spraying both sides with cooking spray. Spray a cookie sheet lined with foil.

On the foil, layer beans and meat on top of a browned tortilla. Cover with a second tortilla and spread that one with taco sauce and sprinkle with cheese. Repeat until you’ve built four pizzas.

Bake for 8 to 12 minutes.

Copycat Taco Bell Mexican Pizzas

I want to know: what fast food indulgence would you love to be able to recreate at home?


Posted in Uncategorized | 8 Comments

Twice-Baked Potato Casserole


twice-baked potato casserole: my go-to always-a-hit holiday/potluck dish

Typically, casseroles aren’t really my thing.

While I appreciate the convenience of a one pot dish, I find that casseroles often tend to have indistinct flavors and an unappealing consistency. That’s not to say I’ve never found a casserole I enjoy; I have. But they aren’t a dish I really choose to make for my family.

With that being said, there are certain flavors and textures that beg to be squished and crammed together in a pan and baked until they’re all hot and steamy and beautiful. The flavors of a loaded baked potato certainly fit that bill.

Sure, this recipe is more difficult than regular baked potatoes. Barely. Besides, bring a dish of these potatoes to your next work or family gathering? You’re a hero. Haul in a bag of lukewarm baked potatoes and an assortment of room temperature dairy toppings? Not so much.

So, if you don’t want your family and coworkers to hate you and/or you don’t want to give anyone food poisoning, you’re going to want to go ahead and make this.

(sidebar: can we just take a moment to acknowledge the difficulty level of photographing potatoes? It’s high.)

twice-baked potato casserole: my go-to always-a-hit holiday/potluck dish


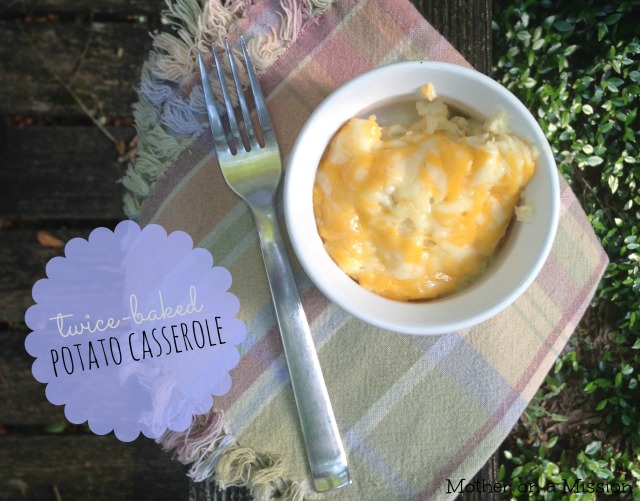
Twice Baked Potato Casserole
adapted slightly from here

6 large baking potatoes- about 4-5 pounds
8 oz. cream cheese, room temperature
1 stick butter, room temperature
16 oz. sour cream
2 cups shredded cheddar cheese, divided
2 cloves garlic, finely minced
2 tsp. salt
1 tsp. pepper
6 slices bacon (1/4 to 1/2 cup- really, can you have too much bacon?), cooked and diced

Wash, prick, and bake your potatoes for one hour and 15 minutes at 350 degrees. (If you’re looking for a summer BBQ recipe and don’t want to heat up your kitchen for that long, you can bake the potatoes in a crockpot.) Let them cool thoroughly or use a folded kitchen towel to hold the potato. Cut your potatoes lengthwise and use a spoon to scoop the insides into a bowl. Be sure to scrape out as much potato as you can.

When potato skins are scooped out, combine potato insides, cream cheese, butter, sour cream, half of cheese, garlic, salt, pepper, and bacon. I usually use my KitchenAid, but you could use a hand mixer or just a spoon.

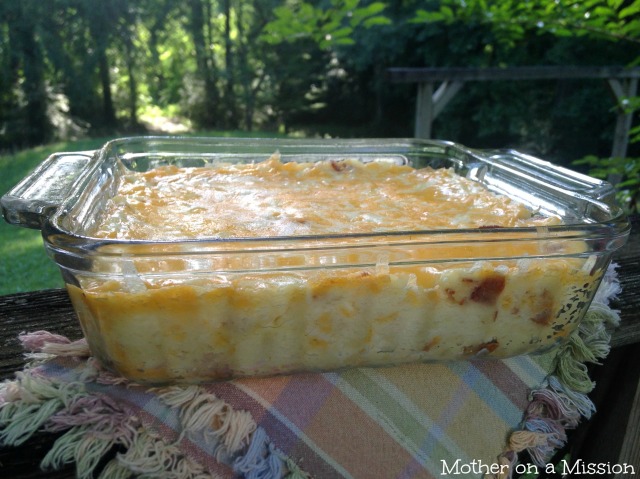
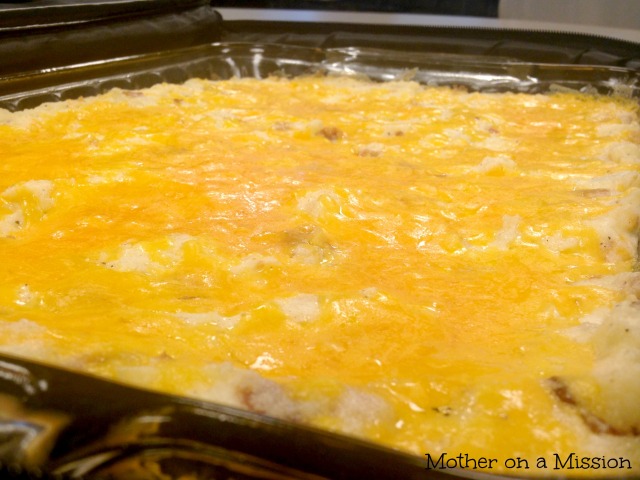
Transfer potato mixture to a greased 9 x 13 dish. At this point, you can bake it and serve it, or you can refrigerate it to bake later. When you’re ready, bake at 350 degrees for 30 to 35 minutes. Sprinkle with remaining cup of cheese and bake for 5-8 minutes more, or until cheese is melted.

twice-baked potato casserole: my go-to, always-a-hit, holiday/potluck dish

I want to know: what’s your go-to potluck dish?

Posted in Uncategorized | Leave a comment

Jalapeño Popper Pizza

Jalapeño Popper Pizza

If you’ve ready any of my previous posts, you might know that the combination of jalapeños and cheese is one I find irresistible- biscuits? sandwiches? I just don’t pass up an opportunity to eat anything with the name “jalapeño popper”.

I also don’t say no to pizza. Ever.

So you can imagine my glee when, while scanning Pinterest, I saw a recipe for jalapeño popper pizza. I spent days drooling over the thought of this recipe. It wasn’t until last Saturday that I had the opportunity to make it.

And it was so worth the wait.

Jalapeño Popper Pizza

Jalapeño Popper Pizza
adapted from here

-1 ball of my never-need-delivery-again pizza dough
-4 ounces cream cheese, softened
-2 jalapeños, seeded and thinly sliced
-1/4 to 1/2 onion, finely diced
-4 slices of bacon, cooked and diced (the first time I made the recipe, I didn’t use bacon and it was still unbelievable)
-1 to 1 1/2 cups grated cheese (pepperjack, cheddar, or any blend will work fine)
-olive oil
-kosher salt

Preheat oven to 475 degrees with pizza stone inside and rack in second lowest position. Roll out the pizza dough to a 10 to 12 inch circle and transfer it to parchment paper. Use a fork to poke holes across the entire crust, leaving a one inch border. Bake crust on parchment paper for 5-7 minutes or until it loses its shine. Note: for full details on this pizza crust recipe, including baking instructions, see the original post.

Remove from the oven and brush olive oil over the outside rim. Spread with cream cheese. It’ll seem like you have too much cream cheese, but trust me, use it all. Next, add your shredded cheese, jalapeños, bacon, and onion. Return to oven and bake 6-8 minutes, until crust is a deep golden and the cheese is melted and bubbly. Remove from oven again and brush olive oil over the outside crust. Sprinkle the whole thing with kosher salt, paying careful attention to the olive oiled rim.

Jalapeño Popper Pizza

I want to know: what flavor combinations are you powerless to resist?

Posted in Uncategorized | Leave a comment

Lighter Chicken Spaghetti


Lighter chicken spaghetti: all of the flavor, none of the canned soups or fake cheese.

For the last five years, it has been my mission in life to find a chicken spaghetti recipe that doesn’t use cream of mushroom and cream of chicken soup and Velveeta cheese. While I am absolutely on board with indulging in that decadent version on occasion- annually at The Fair, for example- I wanted a healthier recipe that uses more whole ingredients and fewer canned ones.

While I wouldn’t necessarily call this recipe healthy, it does have a few points in its favor. First, it’s easy. The sauce comes together on the stove in the time it takes to cook the pasta; thirty minutes in the oven and you’re done. Second, the recipe can be modified to accommodate your preferences and what you have on hand; you can sneak in some vegetables or switch out the cheeses. Lastly, this thing freezes beautifully. Make a double batch, stick half in the freezer, and your work is done.

Lighter chicken spaghetti: all of the flavor, none of the canned soups or fake cheese.


Chicken Spaghetti

-3 cups of chicken, cooked and shredded
-1 lb. whole wheat spaghetti (psst- I usually use whatever I have on hand, which is often not spaghetti)
-1 onion, finely diced
-6 tbs. butter
-4 tbs. flour
-1 tsp. salt
-1/2 tsp. pepper
-1/4 tsp. red pepper flakes (optional)
-1 1/2 cups chicken broth
-1 cup milk
-1 can Rotel tomatoes
-2 1/2 cups shredded cheddar cheese, divided ( I typically use some sort of fiesta blend; any variety of cheddar would be fine)
-1/2 cup shredded Parmesan cheese

Preheat oven to 350 degrees. Cook pasta according to package instructions, but cut the time by a minute or two; the pasta will finish cooking in the oven.

While pasta is cooking, melt two tablespoons of butter in a skillet or saucepan over medium heat. Add the onion and cook about five minutes. Add remaining butter, flour, salt, pepper, and red pepper flakes, if using. Whisk until the flour is dissolved and then cook for two minutes. Slowly add chicken broth and milk, whisking to combine. Cook 3-5 minutes, until the sauce thickens.

In a large bowl, combine drained pasta, chicken, sauce, Rotel, 2 cups of cheddar cheese and 1/4 cup of Parmesan. Mix gently but thoroughly until sauce evenly covers pasta and cheese is melted.

Transfer pasta mixture to a greased 9 x 13 dish- or, like me, one glass 8 x 8 dish for immediate baking and one foil 8 x 8 pan or gallon Ziplock bag for freezing- and bake for 15 minutes. Sprinkle remaining cheeses over the top and bake 15 minutes more (if you’d rather, you can skip adding the cheeses halfway through baking and instead sprinkle a tablespoon or two over each individual serving).

To bake a frozen dish: remove from freezer and let thaw in fridge for several hours. Remove all foil or plastic wrap and bake according to instructions above.

Lighter chicken spaghetti: all of the flavor, none of the canned soups or fake cheese.


I want to know: what decadent, guilt-inducing main dishes would you like to remake?

Posted in Uncategorized | Leave a comment

Sausage & Tortellini

Sausage & Tortellini: a 20 minute one-pot meal that's flavorful and filling.

I’m always eager to read recipes on Pinterest that claim to be “one pot” meals. A quick, delicious meal that’s easy to prepare and only requires my husband me to clean one pan? Tell me more.

More often than not, I’m disappointed by those recipes, though. Most of them seem to be a slight variation of the same tired, boring dishes.

Not this sausuage and tortellini recipe, though. I knew immediately it would be different from others I’d seen because, even though it includes pasta, I don’t have to boil it.

Epic, right? And if that isn’t enough to convince you, the smoky sausage, tangy Parmesan, and subtle spices will do the trick. This meal comes together in under 20 minutes, making it an easy weeknight meal that will taste as if you cooked all day.
Image
Sausage & Tortellini
adapted from here

1 14 oz. package smoked sausage
2-2 1/2 cups tortellini pasta (I use the smaller size package of Buitoni Three Cheese)
1 1/2 cups chicken broth
1 1/2 cups pasta sauce
2 cloves of garlic, minced
1/4 tsp red pepper flakes
2 tsp Italian seasoning
shredded or freshly grated Parmesan cheese
Image
Begin by slicing sausage into 1/2 inch rounds (I like to go one step further and cut mine into half moons). Cook the sausage in a skillet coated with nonstick spray for about 5-7 minutes over medium heat, or until sausage is browning. Add garlic and cook for two more minutes. Next, add the chicken broth, pasta sauce, red pepper flakes, and Italian seasoning. When mixture begins to simmer, add the pasta and cook uncovered for about 10 minutes more- I usually taste a piece of pasta to test if it’s done. Serve topped with Parmesan cheese.

Looking for another super simple but delicious pasta dish? Try my most popular recipe.

I want to know: what types of recipes do you go crazy over on Pinterest?

Posted in Uncategorized | 3 Comments

Baked Chicken & Pepper Egg Rolls

I wasn’t a fan of onions or peppers when I was younger.

Now that I’m not as young, I love them. Can’t get enough of them. I’m fairly certain peppers and onions are my love language.

This recipe pairs the two perfectly, along with garlic and some Asian flavors. The egg rolls are baked instead of frying, making this meal healthy and easy enough for a weeknight family meal.

As with many of my recipes- specifically this one and this one– this recipe can be fully customized to suit your tastes and the ingredients you have on hand.

Baked Chicken & Pepper Egg Rolls
recipe adapted from here

1 lb. boneless skinless chicken
1 large onion
2 bell peppers in the color(s) of your choice
2 cloves of garlic
2 tbs. olive oil
2 tablespoons of soy sauce
1/4 c. stir fry sauce (optional)
12-14 egg roll wrappers
oil or cooking spray
kosher salt for sprinkling

1. Cut chicken, onions, and peppers into thin strips; mince garlic.

2. Heat oil in a large skillet and add chicken. When the chicken is no longer pink, add the peppers and onions and cook for about 5 minutes, stirring occasionally.

3. Add the garlic, soy sauce, and stir fry sauce, if using. Cook for five minutes more.

4. Allow mixture to cool. If you like to make meals ahead, you could stop at this point and refrigerate the chicken and vegetable mixture.

5. When you’re ready to fill the egg roll wrappers, place a couple spoonfuls of the mixture onto the wrapper. Roll the paper according to the package instructions.

6. Place rolls on a lightly sprayed foil-lined baking sheet. Spray them all lightly with cooking spray or brush with oil. Sprinkle with kosher salt.

7. Bake for 10-12 minutes. Note that rolls will not turn golden like they would if they were fried.

**I haven’t tried reheating these, so I can’t vouch for how they would taste. If you aren’t eating them all at once, I suggest baking only enough for one meal, then saving the mixture and baking more later.

Posted in Uncategorized | Leave a comment

Frosted Sugar Cookies

Frosted Sugar Cookies by Mother on a Mission

These cookies. These cookies.

Let’s be real for a second. Is there anything tastier than a well-made sugar cookie? I’m not talking about those crumbly, under-baked messes you buy from the “bakery” section of the grocery store. I’m talking about the real thing. The homemade version, with the slightly crunchy, buttery outside and the chewy, firm inside.

My mom makes a darn good sugar cookie. But since she lives 3000 miles away, I was forced to take things into my own hands this year. And I have to say, that was a pretty good call.

And to answer my previous question? No, no there isn’t.

Frosted Sugar Cookies
cookie recipe adapted slightly from here, frosting recipe adapted slightly from here

Cookies:
1 1/4 cups butter, room temperature
2 cups sugar
1 1/2 tsp vanilla extract
2 eggs
1/2 cup milk
5 cups flour
1 tsp salt
4 tsp baking powder

1. Using a stand or hand mixer, cream together butter and sugar.
2. Add in the vanilla, eggs, and milk and mix until well combined.
3. Add the flour, salt, and baking powder and mix just until everything comes together.
4. Form dough into a ball, wrap in plastic wrap, and refrigerate until firm, about an hour.
5. Roll dough out to 1/4 inch thickness, cut cookie shapes with cookie cutters, and bake at 350 degrees for 9-11 minutes.
6. Cool completely before frosting.

Frosting:
3 cups powdered sugar
1 cup butter, room temperature
1 tsp vanilla
4 tsp whole milk or cream

1. Using a stand or hand mixer, cream together butter and sifted powdered sugar.
2. Add vanilla and milk or cream and mix until frosting comes together.

I want to know: what’s your favorite sugar cookie occasion?

Posted in Uncategorized | Leave a comment