It’s no secret that I love homemade pizza. Love it.
Recently, though, I discovered a whole new use for the dough.
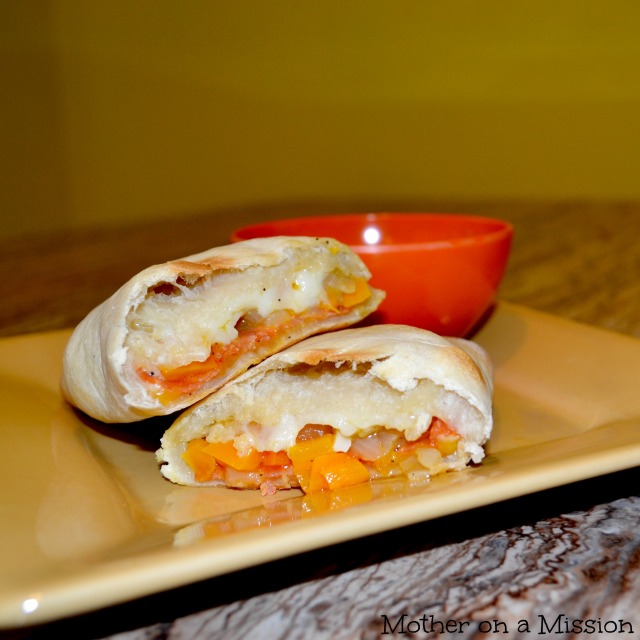
I’ve been making calzones- or giant pizza pockets, if you prefer- and freezing them. I pull them out and bake them to have for lunch. It’s a hot, delicious alternative to a sandwich and it’s much easier than a salad.
The first part of this recipe is exactly the same as my homemade pizza recipe, but I’ll include all the instructions here to make it easier to follow.
While the dough is rising you can gather or assemble the ingredients you need for your filling. Any combination of meats, cheeses, and vegetables will work.
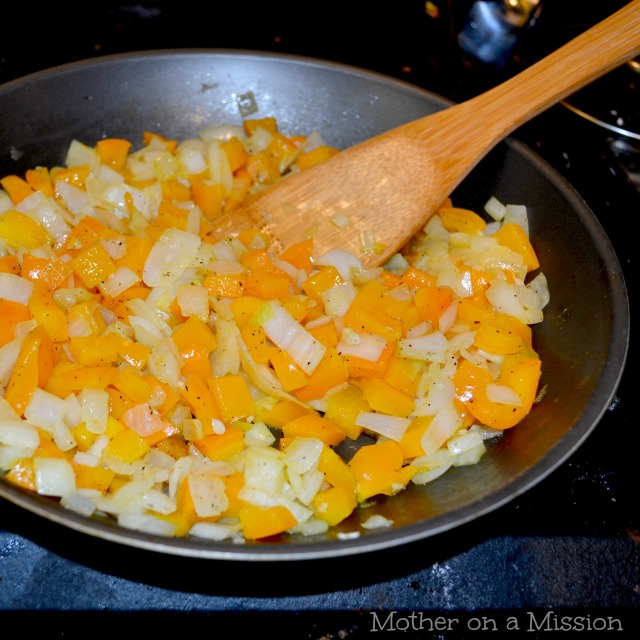
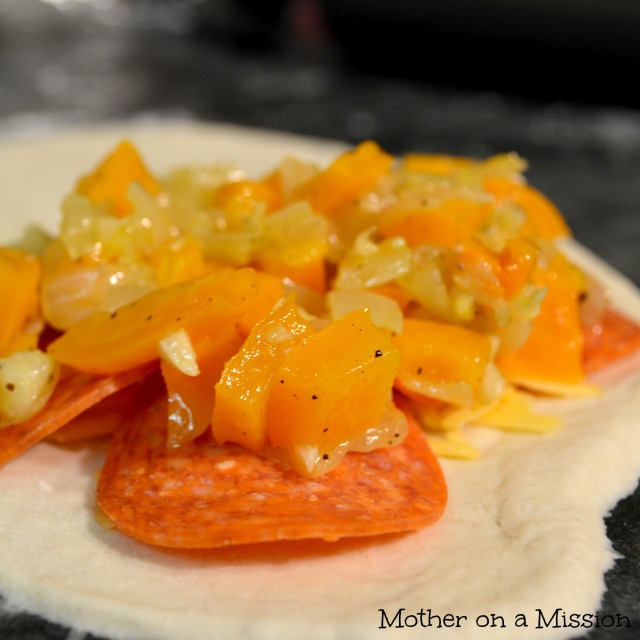
One of my favorite combinations, and the one I used for this batch, is sauteed onions and pepppers, mozzarella cheese, and pepperoni. Just use whatever you like; leftovers work great, too.
When you’re dough is ready, divide it into eighths and roll each piece into a flat circle. Pile your fillings on one half and fold over to form your pocket.
Bake them for a few minutes, just until they’re no longer squishy.
Let the calzones cool completely on the counter and then freeze. Enjoy a delicious homemade pizza pocket whenever the mood strikes.
Homemade Freezer Calzones
makes eight medium size calzones
- 1/2 cup hot water
- 2 1/4 teaspoons instant yeast
- 4 cups bread flour
- 2 teaspoons Oregano
- 1 teaspoon garlic salt
- 1 1/4 cup lukewarm water
- 2 tablespoons olive oil
- your choice of filling
1. In a measuring cup or bowl, sprinkle the yeast over 1/2 cup of hot water. Water should be warm, but not so hot that you can’t stand to hold your hand under it as it comes from the faucet. Set the mixture aside for a minute or two.
2. In the bowl of a stand mixer using the paddle attachment, briefly stir together the flour, Oregano, and garlic salt.
3. Add the lukewarm water to the yeast mixture and stir gently until most of the yeast is dissolved. Add the olive oil.
4. With the mixer on low (for a KitchenAid, this is the “stir” setting) add the yeast mixture to the flour. Mix for about a minute until the dough starts to form a ball around the paddle. Remove the paddle attachment and replace it with the dough hook. Mix (KitchenAid setting 2) for 4-5 minutes. The dough should be cleaning the side of the bowl. The dough might be sticky at this point, but it should be smooth and shiny.
5. Transfer dough to an oiled bowl, or remove the dough from the mixing bowl, clean and spray the bowl, and put the dough back in. Turn the dough so the oiled side is facing up. Cover with plastic wrap and let rise for 1 1/2 to 2 hours, or until dough has doubled in size.
6. After dough has risen, remove the plastic wrap and punch the dough down. Place your pizza stone in the oven on the second-to-bottom rack and preheat to 475 degrees. Turn the dough out onto a lightly-floured surface and, using flour-dusted hands, knead the dough once or twice and shape it into a ball.
7. Divide the ball into two balls of equal size. Cover them with a damp towel and let them sit for 15-30 minutes. After they’ve rested, divide each ball into four equal pieces; this will give you eight pieces total.
8. Using a rolling pin or your hands, work a chunk of dough into a flat circle, about 1/4 to 1/2 inch thick. If the dough springs back as you try to roll it, just let it rest for another 10 or 15 minutes and then try again. Scoop filling onto one half of the dough and fold the other half over the filling. Use a fork to seal the edges. Repeat with the other seven pieces of dough.
9. Place a piece of parchment paper on your preheated pizza stone and put your calzones on top (you might have to do this in two batches). Bake 5-8 minutes, or until dough is just beginning to lose it’s shine and harden. You don’t want the calzones to turn golden.
10. Remove from the oven and cool completely. Transfer to a freezer-quality ziploc bag and place in the freezer.
To prepare: remove desired number of calzones from the freezer. Preheat oven, with pizza stone inside, to 475 degrees. *Note: be sure to let calzone(s) thaw while oven is preheating. When oven is ready, place calzone(s) on parchment paper on the pizza stone. Bake for 12-15 minutes, or until the top is golden brown. Serve with marinara sauce for dipping.
I want to know: what will you fill your homemade freezer calzones with?


Please send me one 🙂 !!!!
I am stopping by from Sew Can Do’s link party!
Beth @ The First Year Blog
Thanks for stopping by!
I’m impressed with anyone who takes their time to make their own dough. This looks wonderful. I can taste them now. Thank you for sharing.
We may have met by chance…but we become friends by choice.
http://simpleesue.com/french-toast-grilled-cheese-sandwich-with-an-italian-twist/
Thank you for your kind words!
I love calzone recipes, I have to try this one, it looks tasty and perfect for a busy preschooler. Stopping by from Tempt my Tummy Tuesdays, have a nice day.
Thanks for stopping by!
I am in love with this idea!!!
I just had one for lunch today. I fall more and more in love with the idea each time I make them!
Great post! (and timely for me)…I’ve been wanting to try something like this. Thanks for the instructions!
You’re welcome! Thank you for coming by!
This looks like a great idea. Our family loves calzones! Thanks for taking the time to share:)
Visiting from Pint-sized Treasures
Oh yum! My kids are on Spring Break and reminding me that I’ll soon need to feed them lunch again every single day in a couple months. These would be great to keep on hand, for them and me!
Sounds so yummy! Looks like a great thing to pull from the freezer for an easy lunch, gotta love that!
Thanks so much for linking up at the Real Family Fun link party! Hope to see you next week.
KC
Wow this looks yummy, Abby.
Thank you so much for joining Pin It Monday Hop#2 Where you pin and get pinned (LINK). Please come back on Sunday at 5pm (CST)for our Pin It Monday Hop#3. Watch out for my 10 features soon. Pinned this to our Pin Board for re-pinning.
Judy
http://www.pursuitoffunctionalhome.com/
http://www.kusinaniinday.blogspot.com/
Pingback: Menu Plan Monday: April 8-14 | Mother on a Mission
Pingback: The only pizza recipe you’ll ever need | Mother on a Mission
Think I could microwave these? Trying to plan easy, microwaveable freezer meals for my husband when he is at work so he doesn’t have to eat leftovers or sandwiches every day. 🙂 Thanks! I absolutely love the idea either way!
You could definitely microwave them! Just be sure to cook them all the way through when you bake them in the oven.
Why do you bake them a little before putting them in the freezer? Can you just put them straight up raw in the freezer and then bake them when you pull them out?
You can definitely freeze them completely raw. I prefer to bake them a little first to speed up the process the second time, but it’s up to you.
Pingback: Baked Chicken & Pepper Egg Rolls | Mother on a Mission
Pingback: how to make the world's best homemade pizza
i’m worried that if i cook the calzones, they will harden in the fridge overnight or not have that “Fresh” taste anymore. I want to make some tomorrow night, and eat them the night AFTER tomorrow. PLEASE HELP!
I think by cooking them only halfway you’ll be fine. If you’re worried, you could try to assemble but refrigerate them completely raw and do all the cooking tomorrow.